Current & Recent Projects
56" Baldwin Upright #12910 (1905)
Traditional mahogany cabinet.. Reconditioned in November 2016 for the owner in Clear Lake, MN.
IMPROVEMENTS:
Complete Cleaning--Clean strings, pressure bar, keybed, keypins, pedal mechanisms.
Recondition Action—Reshape hammers, Tighten action screws, Replace or repair defective parts, Clean & lubricate.
Install Keytops--Remove ivories, clean tops & sides, install new plastic keytops, shape keytops to key edges.
Complete Regulation—All adjustments to ensure that piano plays like new, tune to pitch of C6 (slightly flat).
Original Manufacturer of this brand-name--D.H. Baldwin
Established--1862 by Dwight Hamilton Baldwin, in Cincinnati, OH
Other brand-names used by this manufacturer--Hamilton, Howard, Ellington, Valley Gem,St. Regis, Schroeder, Franke, Acrosonic, Kremlin, Modello, Monarch, Sargent, Winton.
Other manufacturers of this brand-name--Baldwin Piano & Organ Co (1900-2001), Gibson Guitars (2001-2004), Dongbei Piano Group (2004-present).
From: Pierce Piano Atlas, 12th Edition (2008, Larry Ashley Publisher, Albuquerque, NM).
Note: To obtain the age of your piano and details about the manufacturer, click: Pierce Piano Atlas--"the world's most authoritative publication on piano manufacturers, past and present." To learn how a piano works and how to go about buying one, we encourage you to purchase The Piano Book.
A - IN OUR SHOP
![9 - Keys and action parts set aside 9 - Keys and action parts set aside](9 - Keys and action parts set aside.JPG) |
9 - Keys and action parts set aside |
|
![10 - Hammer heads reshaped with Dremel sander 10 - Hammer heads reshaped with Dremel sander](10 - Hammer heads reshaped with Dremel sander.JPG) |
10 - Hammer heads reshaped with Dremel sander |
|
![11 - Screws tightened & centers lubricated 11 - Screws tightened & centers lubricated](11 - Screws tightened & centers lubricated.JPG) |
11 - Screws tightened & centers lubricated |
|
![12 - New bridle tapes installed 12 - New bridle tapes installed](12 - New bridle tapes installed.JPG) |
12 - New bridle tapes installed |
|
![1 - Action on workbench 1 - Action on workbench](1 - Action on workbench.JPG) |
1 - Action on workbench |
|
![2 - Action cleaned with compressed air 2 - Action cleaned with compressed air](2 - Action cleaned with compressed air.JPG) |
2 - Action cleaned with compressed air |
|
![3 - Damper stop rail and sostenuto rail removed 3 - Damper stop rail and sostenuto rail removed](3 - Damper stop rail and sostenuto rail removed.JPG) |
3 - Damper stop rail and sostenuto rail removed |
|
![4 - Damper levers removed 4 - Damper levers removed](4 - Damper levers removed.JPG) |
4 - Damper levers removed |
|
![5 - Worn bridle tapes removed 5 - Worn bridle tapes removed](5 - Worn bridle tapes removed.JPG) |
5 - Worn bridle tapes removed |
|
![6 - regulating rails removed 6 - regulating rails removed](6 - regulating rails removed.JPG) |
6 - regulating rails removed |
|
![7 - Hammer rail removed 7 - Hammer rail removed](7 - Hammer rail removed.JPG) |
7 - Hammer rail removed |
|
![8 - Damper lever removed 8 - Damper lever removed](8 - Damper lever removed.JPG) |
8 - Damper lever removed |
|
B - AT THE PIANO OWNER'S HOME
For contact information, go to the "Home Page"
Selected pictures of the step-by-step improvement process
CLICK PICTURE FOR LARGER IMAGE, THEN CLICK "CLOSE" TO RETURN TO THIS PAGE
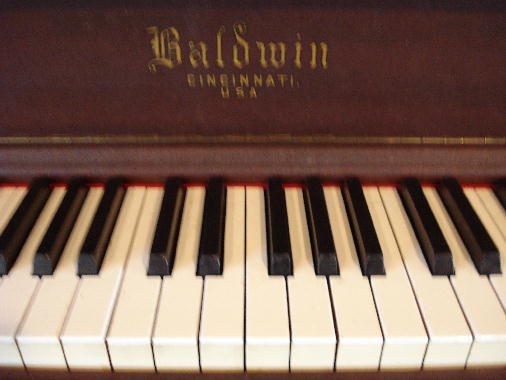
Picture #35 - Close-up of new keys & fallboard
![13 - Old keytops removed 13 - Old keytops removed](13 - Old keytops removed.JPG) |
13 - Old keytops removed |
|
![14 - Tops of keys sanded 14 - Tops of keys sanded](14 - Tops of keys sanded.JPG) |
14 - Tops of keys sanded |
|
![15 - Sides of keys cleaned 15 - Sides of keys cleaned](15 - Sides of keys cleaned.JPG) |
15 - Sides of keys cleaned |
|
![16 - Sides of keys sanded 16 - Sides of keys sanded](16 - Sides of keys sanded.JPG) |
16 - Sides of keys sanded |
|
![17 - New keytops placed in position 17 - New keytops placed in position](17 - New keytops placed in position.JPG) |
17 - New keytops placed in position |
|
![18 - New keytops glued in place with PVC-E glue 18 - New keytops glued in place with PVC-E glue](18 - New keytops glued in place with PVC-E glue.JPG) |
18 - New keytops glued in place with PVC-E glue |
|
![19 - A new keytops installed 19 - A new keytops installed](19 - A new keytops installed.JPG) |
19 - A new keytops installed |
|
![20 - Edges of keytops shaped to key on router 20 - Edges of keytops shaped to key on router](20 - Edges of keytops shaped to key on router.JPG) |
20 - Edges of keytops shaped to key on router |
|
![21 - Key inside edge shaped to key with router jig 21 - Key inside edge shaped to key with router jig](21 - Key inside edge shaped to key with router jig.JPG) |
21 - Key inside edge shaped to key with router jig |
|
![22 - Broken key repaired 22 - Broken key repaired](22 - Broken key repaired.JPG) |
22 - Broken key repaired |
|
![23 - Keytops cleaned & polished 23 - Keytops cleaned & polished](23 - Keytops cleaned & polished.JPG) |
23 - Keytops cleaned & polished |
|
![24 - Straighten misaligned hammers 24 - Straighten misaligned hammers](24 - Straighten misaligned hammers.JPG) |
24 - Straighten misaligned hammers |
|
![25 - Damper rod cleaned, lubricated, re-installed 25 - Damper rod cleaned, lubricated, re-installed](25 - Damper rod cleaned, lubricated, re-installed.JPG) |
25 - Damper rod cleaned, lubricated, re-installed |
|
![26- Damper levers re-installed 26- Damper levers re-installed](26- Damper levers re-installed.JPG) |
26- Damper levers re-installed |
|
![27 - Sostenuto bar & damper stop rail re-installed 27 - Sostenuto bar & damper stop rail re-installed](27 - Sostenuto bar & damper stop rail re-installed.JPG) |
27 - Sostenuto bar & damper stop rail re-installed |
|
![28 - Ready for return to piano! 28 - Ready for return to piano!](28 - Ready for return to piano!.JPG) |
28 - Ready for return to piano! |
|
![29 - Key cloth & felt underkey punchings replaced 29 - Key cloth & felt underkey punchings replaced](29 - Key cloth & felt underkey punchings replaced.JPG) |
29 - Key cloth & felt underkey punchings replaced |
|
![30 - Hammer blow distance & key leveling corrected 30 - Hammer blow distance & key leveling corrected](30 - Hammer blow distance & key leveling corrected.JPG) |
30 - Hammer blow distance & key leveling corrected |
|
![31 - Letoff regulated 31 - Letoff regulated](31 - Letoff regulated.JPG) |
31 - Letoff regulated |
|
![32 - Damper spoons regulated 32 - Damper spoons regulated](32 - Damper spoons regulated.JPG) |
32 - Damper spoons regulated |
|
![33 - Piano tuned 33 - Piano tuned](33 - Piano tuned.JPG) |
33 - Piano tuned |
|
![34 - Piano re-assembled 34 - Piano re-assembled](34 - Piano re-assembled.JPG) |
34 - Piano re-assembled |
|
![35 - Close-up of keys & fallboard 35 - Close-up of keys & fallboard](35 - Close-up of keys & fallboard.JPG) |
35 - Close-up of keys & fallboard |
|